Saturday, June 30, 2012

Your Spice Rack - How to Use Spices When Cooking


Your Spice Rack - How to Use Spices When Cooking

Your Spice Rack - How to Use Spices When Cooking


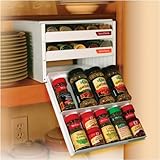
I love to cook. I suppose it's part of being a devotee Herbalist; the curative herbs I use are often found in my spice rack or crisper drawer. If you were wondering what that montage of small bottles and tins can do for you, read on about some of my favorites, what they can do for food and for your health.

Your Spice Rack - How to Use Spices When Cooking


Your Spice Rack - How to Use Spices When Cooking


Your Spice Rack - How to Use Spices When Cooking

Your Spice Rack - How to Use Spices When Cooking

Your Spice Rack - How to Use Spices When Cooking
1) Cayenne: Not all tastebuds can cope the heat of this spice. It can unmistakably cause burns in the mouth and throat. However, it stimulates digestive juices, helping your body to make good use of the nutrients taken with it. We use it mostly in meats and soups, however try adding a pinch to your hot chocolate...it can unmistakably make it stand out.
2) Chili Powder: These are made from hot peppers, but normally milder versions that are easy on the tongue. It is unmistakably good in barbecue sauce, chili and other Mexican foods. Like cayenne, it can stimulate digestive juices.
3) Cinnamon: This spice is mostly used in desserts or drinks, though some cuisines add it to their savory dishes. I use it for colds and sore throats, along with a few other ingredients, including the one below. For a tea, use stick cinnamon as the powdered stuff won't do.
4) Cloves: Ham and pumpkin pie would not be the same without cloves. For the pie, powdered is best as you don't unmistakably want to chomp down on a bit of not quite ground cloves. Oil of cloves has been used as a dental numbing agent for centuries, but use caution when applying as it can burn.
5) Garlic: Garlic bread, salmon with garlic and olive oil, roasted garlic on toast, there are a lot of culinary uses for this bulb. Medicinally, it's used for infections and to lower blood pressure.
6) Ginger: This is another ingredient to pumpkin pie, but it is mostly used fresh in Asian cuisine. Egg flower soup and stir fry may include some fresh ginger. It is also an expectorant, helping reMove phlegm from the lungs. If you have a sore throat, you may want to use caution because it is spicy. another use for ginger is nausea, especially from morning sickness and motion sickness.
7) Marjoram: This is a mild herb, often used for fish and chicken. If you're planning a camping trip, dry drinking a broth or tea of this herb at least once a day. It may make your sweat too spicy for insects to dine on. Your Spice Rack - How to Use Spices When Cooking
8) Parsley: Italian cuisine loves parsley, as do many others. It goes with salads, fish and chicken. It can also be used as part of a mustard/parsley crust for pork loin roasts. Herbalists use it primarily as a diuretic, something that pulls fluids from your system. If you're pregnant, don't use it in healthful amounts as it may cause uterine contractions.
9) Rosemary: If you like this herb, try using stems from it as skewers for shrimp and chicken. It is very strong, however. Herbalists use it to help deal with depression, but caution is advised if you have high blood pressure. It has a reputation of making it go up. Your Spice Rack - How to Use Spices When Cooking
The herbs and spices in your cabinet can be put to many uses. When I first started learning, I read some cookbooks cover to cover to make sure I understood what was used for what. That may be a good place for you to start.
Your Spice Rack - How to Use Spices When Cooking


Your Spice Rack - How to Use Spices When Cooking 

Saturday, June 23, 2012

Cake Pans - How to Keep Cakes From Sticking to Them


Cake Pans - How to Keep Cakes From Sticking to Them


For many novice bakers, baking cakes may not be the problem. Finding recipes or decorating may not be the question either. Their biggest question may be keeping cakes from sticking to cake pans. In this article, I'm going to give you 5 useful tips to ensure your cakes never stick to your cake pans.

Cake Pans - How to Keep Cakes From Sticking to Them

Cake Pans - How to Keep Cakes From Sticking to Them

Cake Pans - How to Keep Cakes From Sticking to Them


Cake Pans - How to Keep Cakes From Sticking to Them


Cake Pans - How to Keep Cakes From Sticking to Them

1. Make sure to let the cake cool the permissible whole of time.

If the cake is sticking to the cake pan, the first thing to look at is whether or not you're letting it cool sufficiently. Most recipes advise cooling the cake on a rack about 5 to 15 minutes, then running a knife around the edge before turning it out of the pan. Just by taking these steps, you can preclude your cakes from ever sticking.

2. Use a mixture of equal parts flour, vegetable or canola oil, and shortening.

If you're unsure what to grease your cake pans with, try the above mixture. Blend the ingredients fully and use a pastry brush to apply to your cake pans. Once the cake is done baking, you can then place the cake pan on a cooling rack. Allow it to cool as recommended in tip whole 1 before removing it.

3. Cut a piece of parchment paper and line your cake pan with it, and dab some butter under and on top of the paper.

This is a neat trick I learned from a good friend, and seems to work flawlessly every time. It's like "insurance" that the cake will come out. When you take off the cake it should come out of the cake pan quite indubitably paper and all. Then, all you have to do is peel the paper from the cake.

4. Don't let the cake cool too long.

Some bakers may be letting their cakes cool too much. Most cakes should be reMoved from their cake pans after 5 to 15 minutes, but certainly within 30 minutes of cooling on a rack. Anything after that may be detrimental. However, some recipes call for letting your cakes cool a bit longer. If that's the case, then just succeed the formula instructions. Unless the formula calls for it, stick to tip whole 1.

5. Use aluminum foil to line your cake pans.

This is similar to using parchment paper, but is a more cost productive alternative for those prudent bakers out there. Aside from being cheaper, you can also mold foil a tiny tighter to the pan than with parchment paper. Foil works best for round and quadrilateral cake pans. You can line your pans with foil enough to reach up and over the sides. You may even use the extra foil as a type of "handle" to help lift the cake out of the pan.

I know how frustrating it can be to have your cakes stick to your cake pans. You can now use my 5 tips in any mixture that makes sense to ensure that your cakes never stick to your cake pans again. Instead of tearing up that cake as you try to take off it from its pan, you can ensure an easy and easy release, ensuring your cakes all the time come out Finding as good as they taste.

Cake Pans - How to Keep Cakes From Sticking to Them

Tags : Rechargeable Batteries | Green Battery Chargers | Shelf Clips Fun Rugs Olive Kids Style Dinosaurland Rug Bookends

Saturday, June 16, 2012

Pantry Shelves


Pantry Shelves


Organizing pantry shelves is a cinch due to the many kitchen club products available on the market today. To get started, one should reMove all contents from the pantry and clean the pantry shelves with a damp cloth. Next, expired food should be discarded. It is also a good idea to take unwanted canned goods to a food bank.

Pantry Shelves

Pantry Shelves

Pantry Shelves


Pantry Shelves


Pantry Shelves

Once the pantry is emptied and old contents are reMoved, think what areas of the pantry need attention. For instance, many people struggle to keep spices organized. In fact, seeing complicated jars of same spices are coarse when organizing pantry shelves. This is because the labels of the spices cannot be in effect seen. Multi-tiered spice shelves are available to deal with this issue.

If spilled sugar, flour and cereals are a problem, one might think purchasing plastic dispensers for those items. These are relatively reasonable due to the many brands available. Twist ties or bag clips are also an reasonable and easy way to keep bagged foods fresh.

Plastic caddies are made to corral similar items, such as foils, plastic wraps and plastic bags. Families who drink coffee might advantage from purchasing a plastic caddy for coffee filters, coffee, coffee flavorings and creamer. If the pantry is simply not large enough to accommodate a family, they might think purchasing an over-the-door pantry organizer. These typically have everywhere from five to eight shelves and can hold dozens of canned goods and boxed items.

Once items have been returned to pantry shelves, one should think placing a magnetic board on the pantry door to be used for shopping lists.

Pantry Shelves

See Also : Rechargeable Batteries | Green Battery Chargers | Gaggia Pure Review BMX Bicycle / Skateboard Helmet

Saturday, June 9, 2012

How To Make Pizza - A Step By Step Guide To Show You How To Make Pizza


How To Make Pizza - A Step By Step Guide To Show You How To Make Pizza


So you want to learn how to make pizza yourself? production pizzas is quite easy when you know the steps involved. Corollary this step by step guide to production your own pizzas at home, and pleasure every person with the flavor of your hands.

How To Make Pizza - A Step By Step Guide To Show You How To Make Pizza

How To Make Pizza - A Step By Step Guide To Show You How To Make Pizza

How To Make Pizza - A Step By Step Guide To Show You How To Make Pizza


How To Make Pizza - A Step By Step Guide To Show You How To Make Pizza


How To Make Pizza - A Step By Step Guide To Show You How To Make Pizza

Step 1. establishment your tomato pizza sauce

Melt the butter with the olive oil and moderately but wholly sauté the garlic and onion in a skillet.

Add the tomatoes, salt, pepper, oregano, basil and puree. Bring to a boil, then simmer covered for two hours. Stir occasionally, crushing the tomatoes with a potato masher.

Continue to mash, stir, and simmer partially covered until the sauce reaches the consistency of a rich soup.

Step 2 production Pizza Dough

Making your own pizza dough by hand is both moving and satisfying. Home made pizza dough, "from scratch," is without a doubt the single most defining factor that differentiates a great pizza from any other pizza that you will ever have. And, the personal gratification that comes of successfully production pizza at home for yourself, your loved-ones and your friends makes it all the more worthwhile.

Step 3 Panning the prepared Pizza Dough

Panning the dough is the step where you use a rolling pin or machines to create the pizza base with your dough. There are machines that help you sheet and pan the pizza dough, or you can use the hand tossing recipe or the rolling pin if you want to do it yourself.

Depending on the style, size, composition and whole of pizzas you choose to make, the methods of sizing, shaping, trimming, and ultimately, panning the pizza dough, will vary.

step 4 Topping the Pizza

First, spread the pizza sauce evenly over the surface of the dough. Spoon the sauce out to the edge of the dough sheet, leaving "un-sauced" about 3/4" to 1" of the dough crust.

Next, layer the shredded cheese creating an evenly distributed bed of cheese on which to dispose your toppings. (You will use an additional one cup of cheese for finishing off the top of the pizza.)

From this point on, let your eyes, nose, creativity and taste buds take over to add other toppings to your pizza.

Some toppings, (fresh vegetables, confident cheeses and fatty meats), are higher in moisture and fat article and you have to take this into inventory when you use them, to ensure your pizza doesn't turn out soggy.

Step 5 Baking the Pizza

The final step is to bake to pizza. When you oven is at the right temperature place a prepped pizza in the town of the middle rack to allow for maximum air circulation nearby the pan.

Make adjustments to your baking process one at a time until you've found the exquisite balance of rack position, temperature and baking time to suit your oven.

Signs to look for that the pizza is ready are:

- The cheese has melted on top and is starting to brown,

- The crust edge has browned, from a medium to a golden brown, and,

- carefully lift the edge of the pizza to seek its bottom. The bottom dough should be evenly browned.

If these signs are evident, your pizza is done!

How To Make Pizza - A Step By Step Guide To Show You How To Make Pizza

Visit : Rechargeable Batteries | Green Battery Chargers | Zukes Mini Naturals Dog Treats

Saturday, June 2, 2012

Steps to Cooking Deer Sausage


Steps to Cooking Deer Sausage


Venison is the name of the meat made from a variety of deer species of meat and can be eaten in the form of steaks, roasts, or sausages. Talking about deer sausage, it comes in whether fresh sausage, meaning without curing salt; cured which contains some sort of curing compound or salt; the dried form which means no cooking was done or even semi-dry such as the smoked sausages.

Steps to Cooking Deer Sausage

Steps to Cooking Deer Sausage

Steps to Cooking Deer Sausage


Steps to Cooking Deer Sausage


Steps to Cooking Deer Sausage

Now we will see how to cook deer sausage. The recipes are infinite along with applying methods such as frying, broiling, smoking or baking. Since the meat is fat-free, hence it is usually needs the pork as a flavoring and fat enhancement.

The tools required to cook deer sausages are a large mixing bowl, a refrigerator, an oven and sausage casings. In the case of ingredients, you will need four and a half pounds of ground venison, one pound of ground pork sausage, two tablespoons of salt, two tablespoons of sugar, two tablespoons of hickory smoked salt, two and a half tablespoons of garlic powder, two and a half tablespoons of mustard seeds, and lastly two and a half tablespoons of black pepper.

Firstly, you would have to mix the pork and venison together in the large bowl. Consolidate the spices or seasonings into the bowl and mix them well. You may add the pepper as one of the seasonings if you prefer the sausages to be spicy. Next, place the ground meat in a container covered with a lid and refrigerate for practically a day. After it is done, take off the bowl from the refrigerator and mix the ingredients again to ensure it is well-marinated. Then return the bowl into the refrigerator for three more days.

When it is time, take off the compound and place an acceptable number of the meat into the sausage casings. You should be true not to put too much as the casing might burst due to inordinate number of meat. There are a few methods on how to cook deer sausage.

To bake the deer sausages, place the casings on an oven rack and put the rack into a preheated oven. Let the sausage cook for eight hours at 140 degrees or you may shorten the time to four hours at 280 degrees. Do not cook too many sausages at a time and remember to cool the sausages for five minutes before serving them.

Besides baking, you can also cook deer sausage by frying. You need to first heat the oil in the frying pan or wok and place the sausages into the pan. Gently fry them using medium heat, occasionally turning the sausages. Carry on frying until the liquid in the pan has evaporated. After the sausages are cooked, place them onto a paper towel to allow excess oil absorption. Then your deer sausages are done and prepared to be served!

Steps to Cooking Deer Sausage

Thanks To : Rechargeable Batteries | Green Battery Chargers | Britax USA Baby Car Seat Curious George